In my last post I stated that I was worried about doing the decreases properly. The pattern was a bit confusing, but I managed to figure it out while knitting it. I think understanding the mock cable pattern and thinking a few rows ahead really helped me with the decreases. Basically you are merging two mock cables in the decrease locations - once the cables have merged, you perform the decrease stitches in the next mock cable rows. I contemplated not knitting the ear flaps and putting a pompom on top, but I really liked the idea of strings hanging from the side and wanted a hat that she could wear under her hooded coat.
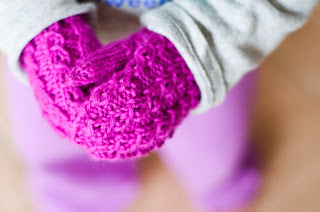
After knitting the hat, I really wanted a pair of matching mitts. I don't know what it is about having a matching hat and mitts makes it more complete. Since there was not pattern available for mitts I thought I would just make it up myself. I took my knowledge from the mittens I've knit in the past and came up with a pattern. Here's the basics:
Cast on 28 sts
Rounds 1-14: k2,p2 ribbing
Rounds 15-22: knit the same mock cable pattern as the hat
Thumb gusset:
Round 23: k1fb, k1fb, knit mock cable pattern
Round 24: k4, knit mock cable pattern
Round 25: k1fb, k2, k2fb knit mock cable pattern
Round 26: k6, knit mock cable pattern
Transfer 6 sts to a stitch holder, cast on 2 sts, then continue the mock cable pattern until about 1” from the top, then do 3 decreases (spaced out as evenly as possible) every other row until you get near the top, then k2tog until you’re left with 4-5 sts (I forgot how many).
For the thumb, pick up 4 sts from the top of the thumb hole, the continue to knit the 6 sts the off stitch holder. Knit in a round until desired length (I did 12 rows), then k2tog until there are 3 sts.
If you need the mitts bigger, the next size up would have to cast on 32sts (multiples of 4) and for the do 4 decreases spaced evenly.
I absolutely love the mitts with the hat :) So happy with them!


No comments:
Post a Comment