A few months ago my friend Jo (who I've known since high school) approached me about making her a pair of custom leg warmers. She couldn't find any that fit her properly and in a style that she wanted. So I set out to design a custom pair for her.
We started out with the basics - she wanted something warm and cozy, and in a material that was machine washable. My first thought was to use a wool/acrylic blend, but to really make it warm and cozy I thought it would be better to use a merino superwash. I think if budget was an issue I would have definitely chosen the wool/acrylic blend, but because Jo was willing to spend a bit more, I opted with Cascade 220 bulky superwash. It's so soft! :D I'm in love with this yarn :) Plus it came in the colours she was looking for :)
She told me she wanted a gray pair, with a teal stripe down the side with orange buttons on the top. She like the idea of having a cable go down the side with the stripe. The only issue I had with the cables is the fact that a leg calf would cause an uneven stretch along the length, which would distort the cable pattern more at the top (the cables would look more wider at the top). I still wanted to keep the idea of a cable pattern, so I designed it so the bottom half of the leg warmer stripe had a cable detail.
At first I was trying to knit the leg warmer as a round, changing colours without cutting the yarn (imagine the amount of weaving in the ends if I did!), but I found it was too loose between the stripe and the body of the leg warmer. This is when I made the split decision to start over and knit the body of the leg warmer and stripe separately, then kitchener-stitch it together. I found some reddish-orange buttons, and here's what I came up with:
November 27, 2013
November 2, 2013
S and her new hat
I finished S' hat :) It only took a lazy 3 days to finish the hat. I think it turned out well! Here she is rocking her new hat.
Mittens
Cast on 28 sts
Rounds 1-14: k2,p2 ribbing
Rounds 15-22: knit the same mock cable pattern as the hat
Thumb gusset:
Round 23: k1fb, k1fb, knit mock cable pattern
Round 24: k4, knit mock cable pattern
Round 25: k1fb, k2, k2fb knit mock cable pattern
Round 26: k6, knit mock cable pattern
Transfer 6 sts to a stitch holder, cast on 2 sts, then continue the mock cable pattern until about 1” from the top, then do 3 decreases (spaced out as evenly as possible) every other row until you get near the top, then k2tog until you’re left with 4-5 sts (I forgot how many).
For the thumb, pick up 4 sts from the top of the thumb hole, the continue to knit the 6 sts the off stitch holder. Knit in a round until desired length (I did 12 rows), then k2tog until there are 3 sts.
If you need the mitts bigger, the next size up would have to cast on 32sts (multiples of 4) and for the do 4 decreases spaced evenly.
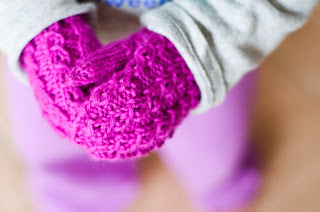
I absolutely love the mitts with the hat :) So happy with them!
In my last post I stated that I was worried about doing the decreases properly. The pattern was a bit confusing, but I managed to figure it out while knitting it. I think understanding the mock cable pattern and thinking a few rows ahead really helped me with the decreases. Basically you are merging two mock cables in the decrease locations - once the cables have merged, you perform the decrease stitches in the next mock cable rows. I contemplated not knitting the ear flaps and putting a pompom on top, but I really liked the idea of strings hanging from the side and wanted a hat that she could wear under her hooded coat.
After knitting the hat, I really wanted a pair of matching mitts. I don't know what it is about having a matching hat and mitts makes it more complete. Since there was not pattern available for mitts I thought I would just make it up myself. I took my knowledge from the mittens I've knit in the past and came up with a pattern. Here's the basics:
Cast on 28 sts
Rounds 1-14: k2,p2 ribbing
Rounds 15-22: knit the same mock cable pattern as the hat
Thumb gusset:
Round 23: k1fb, k1fb, knit mock cable pattern
Round 24: k4, knit mock cable pattern
Round 25: k1fb, k2, k2fb knit mock cable pattern
Round 26: k6, knit mock cable pattern
Transfer 6 sts to a stitch holder, cast on 2 sts, then continue the mock cable pattern until about 1” from the top, then do 3 decreases (spaced out as evenly as possible) every other row until you get near the top, then k2tog until you’re left with 4-5 sts (I forgot how many).
For the thumb, pick up 4 sts from the top of the thumb hole, the continue to knit the 6 sts the off stitch holder. Knit in a round until desired length (I did 12 rows), then k2tog until there are 3 sts.
If you need the mitts bigger, the next size up would have to cast on 32sts (multiples of 4) and for the do 4 decreases spaced evenly.
I absolutely love the mitts with the hat :) So happy with them!
Subscribe to:
Comments (Atom)


